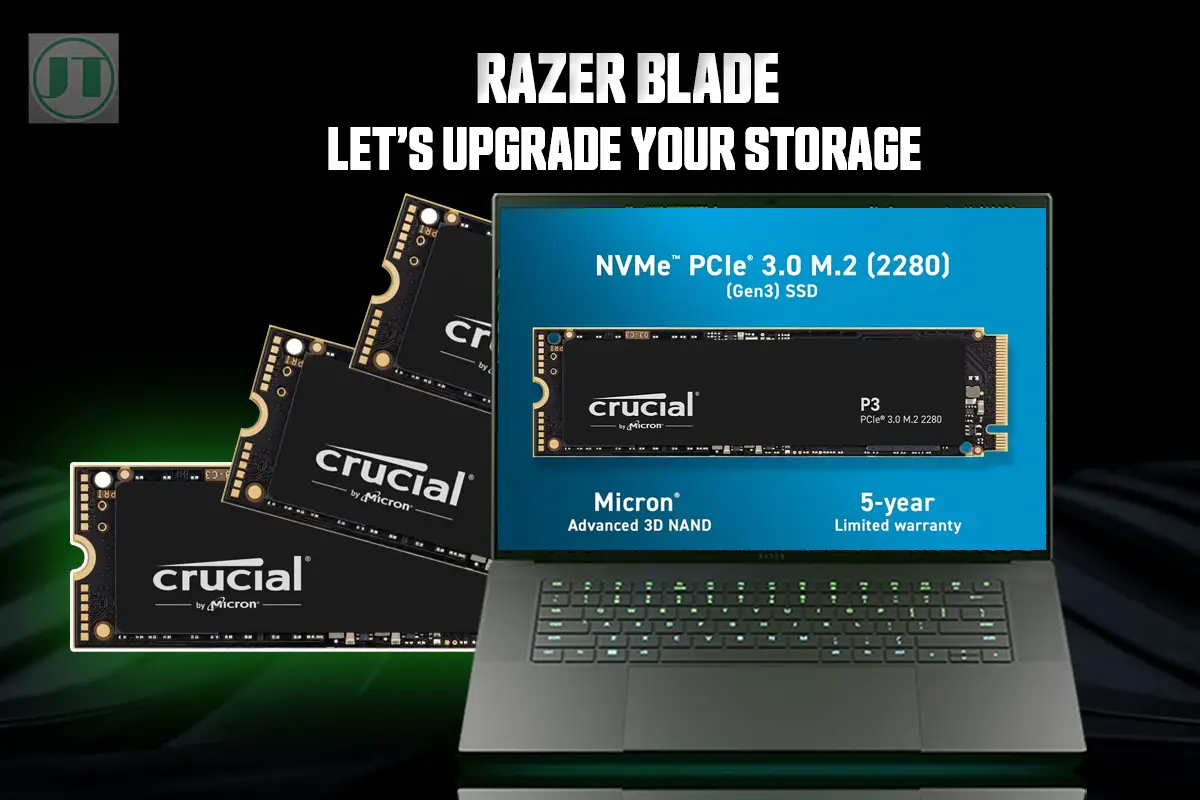
Running out of storage space on your Razer Blade while gaming and looking for a way to optimize performance and enhance your gaming experience? In this guide, I will show you how to upgrade the storage on Razer Blade laptops and unlock a whole new level of potential.
Upgrading storage on your Razer Blade will not only provide you with ample space for all your games, but improved loading times, and room for important backups and updates, but also help to keep your gaming hardware up-to-date and running smoothly.
So, get ready as we delve into the details of adding more SSD storage to the Razer Blade 15, 16, 17, and 18 gaming notebooks, and unleash the true power of your gaming rig!
Compatibility For Razer Blade Storage Upgrades
In order to maximize the storage capacity of your Razer Blade laptop, it is essential to explore the different storage options available. Understanding the compatibility requirements for upgrading the storage space will ensure a seamless and efficient process.
Understand Compatibility Requirements
Before a storage upgrade, it is crucial to ensure compatibility with your Razer laptop. But, most modern Razer laptops have M.2 PCIe NVMe drives as their primary storage option. So, when selecting an SSD, ensure it is compatible with your Razer Blades interface.
Different Solid-State Drive (SSD) Options
When selecting the best SSD for Razer Blade laptops, the type of SSD you choose can provide significant benefits in terms of speed and performance. The various solid state drive options available that cater specifically to gaming laptops like Razer’s laptops are:
- NVMe SSD: NVMe (Non-Volatile Memory Express) SSDs offer lightning-fast read and write speeds, allowing for quick boot times and reduced loading times in games.
- SATA III SSD: SATA III SSDs are a more budget-friendly storage option that still provides a substantial improvement over traditional hard drives.
- Capacity Considerations: Depending on your needs and budget, consider choosing an SSD with ample capacity like 1TB or 2TB of storage space to accommodate your operating system, your video games and other files and applications you use.
Consider External Storage Solutions
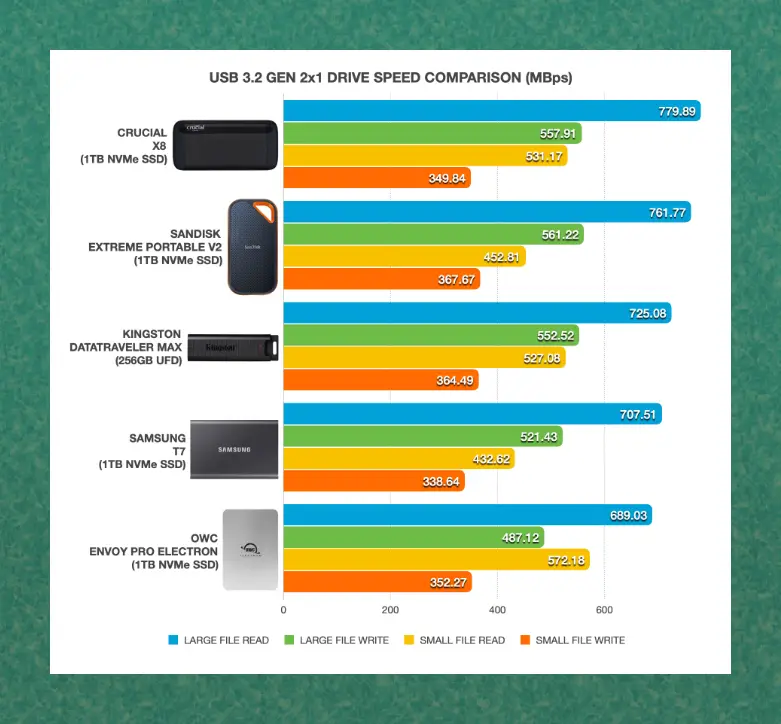
If you need even more storage capacity beyond what your internal drive can provide, external storage solutions can be more affordable. External hard drives or portable SSDs allow you to expand your storage without having to open up your Razer laptop and risk damage.
External SSDs or HDDs connect via USB ports and offer convenient plug-and-play functionality. If you decide on buying an external SSD, ensure that you consider the drive speed and storage capcity the device offers before making your decision.
Tools Needed For Upgrading SSD Storage Space:
Now it’s time to jump into our guide on how to upgrade the SSD storage space on Razer Blade laptops, but first you’ll need a few tools to ensure a smooth process.
Here are some essential tools to consider:
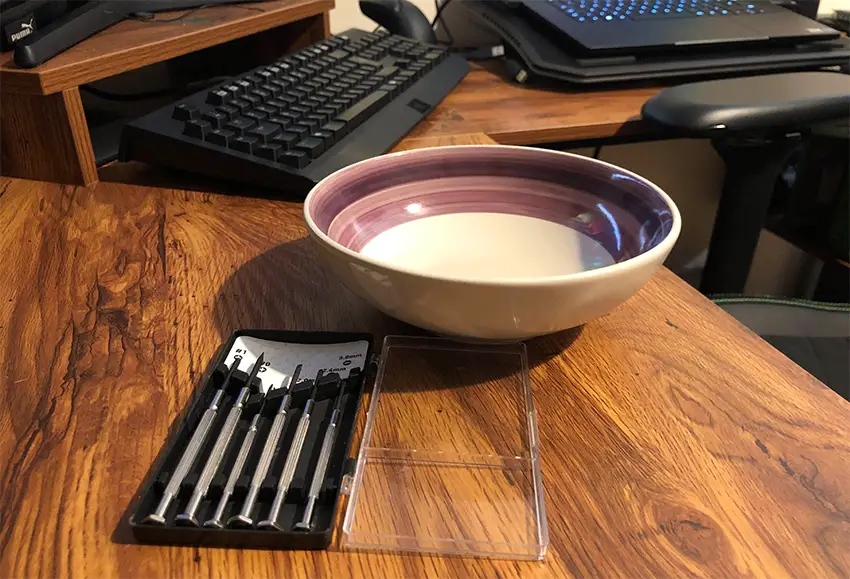
- T5 Screwdriver Set: A set of precision screwdrivers with a Philips head and T5 Torx head will be needed to remove screws that secure the back panel and SSD slot.
- Anti-static Wrist Strap: To protect your PC components from electrostatic discharge.
- USB thumb external drive – To back up data and create a Windows recovery drive
- SATA-to-USB Adapter: Will allow you to clone your existing SSD.
- New Samsung SSD: To replace the storage, you will want a good SSD drive, and some good brands include Samsung, Crucial, and WD_Black Game Drives.
How To Upgrade the Storage On Razer Blade Laptops
To upgrade the storage on your Razer Blade laptop, it’s essential to follow a detailed guide to ensure a smooth upgrade process. Here you will learn how to create a system recovery stick, how to open the Razer Blade and locate the solid state drive slot, how to boot from a recovery drive, and finally how to troubleshoot any issues that may arise.
Step1# – Backup files and create a Windows recovery drive
The first step in upgrading the storage on the Razer Blade gaming notebook is to get all your important files and data organized and then backed up. This way, you won’t lose any of your precious game saves or important documents.
- Organize Your Data and Back Up Files: Organize your files, group documents, photos, videos, and other data into folders to make the backup process smoother. Then, connect an external hard drive, USB flash drive, or use cloud storage like OneDrive.
- Create a System Recovery Stick: Follow this guide by Razer on how to create a system recover stick. Follow the instructions carefully to complete system recovery.
- Set Sleep Mode to Never in Windows: When upgrading storage on the Razer Blade, make sure your computer does not go into sleep mode during the upgrade process. Go to Press Windows Key > System > Power & Battery > Screen & Sleep, and change all settings to Never, then click the X to close the Windows sheet.

Step2# – Power off and unplug all cables from the Razer Blade
After backing up your most important files, and have created your recovery stick, find a flat clean and safe place to carry out the storage upgrade. Make sure your power off your Razer laptop, and remove all cables, devices and peripherals connected to it.
Step3# – Unscrew bottom Razer Blade plate and remove
Grab a bowl to keep the screws safe and secure and the turn your Razer Blade upside down and lay it flat on the table, using the T5 screw driver to remove the T5 Torx screws from the back plate and place them in the bowl. Be careful not to apply too much force.
Next, using your fingers, pry the back plate off the laptop, again do not apply too much pressure. If you struggling to remove the plate use a credit card to apply a little more force. Then, place the back plate on the table away from your laptop.
Tip: Use compressed air to blow debris and dust away from the back plate. Then wipe it gently with a microfiber cloth and isopropyl alcohol spray.
Step4# – Remove built-up static electricity
To prevent any unwanted damage to your device, it is vital to remove built-up static electricity from your body. By touching a radiator with both hands or any other grounded metal object before you start working on your laptop.
If you want to ensure maximum protection against static electricity, get yourself an anti-static wrist strap which is designed to safely discharge any static electricity from your body while you work on sensitive electronics like your Razer Blade.
Once you’re all strapped up and connected to the grounding point, any static electricity that builds up on your body will be safely discharged, keeping your laptop safe and sound.
Step5# – Locate the SSD slots and unscrew Philips screws
The next step is to locate the SSD slot and remove the screw holding the SSD in place and then slide it out and insert new compatible SSD into the slot available. Depending on which Razer Blade model you have, there will be either one SSD slot or two SSD slots.
For example, the Razer Blade 16 has one M.2 slot, where the SSDs are on top of each other, the primary SSD and a space for a secondary SSD. The Razer Blade 18 has the same, but can accommodate two double sided SSDs amounting to 8TB of storage in total.

| Razer Blade Model | SSD Slot Configuration | Storage Amount |
|---|---|---|
| Razer Blade 14 2023 | NVME or SATA-III, Double Sided, up to 4 TB SSD | 4TB SSD |
| Razer Blade 15 2023 | Two PCIe Gen 4 NVMe up to 4 TB SSD | 4TB SSD |
| Razer Blade 16 2023 | Two PCIe Gen 4 M.2 SSD Slots (on top of each other) | 4TB SSD |
| Razer Blade 17 2022 | PCIe SSDs, two slots upgradeable to 4 TB SSD | 4TB SSD |
| Razer Blade 18 2023 | PCIe – SATA SSDs, two slots upgradeable to 4 TB SSD | 8TB SSD |
However, they will have a screw holding the slot in place. So, grab your Philips screwdriver and unfasten the screw, and then the SSD slot should pop up. Put the old SSD in a safe place, and then carefully take out your new SSD and slide it in the space available until it clicks in place. Finally, screw the placeholder securely back down.

Step6# – Clean internally and replace bottom plate and screws
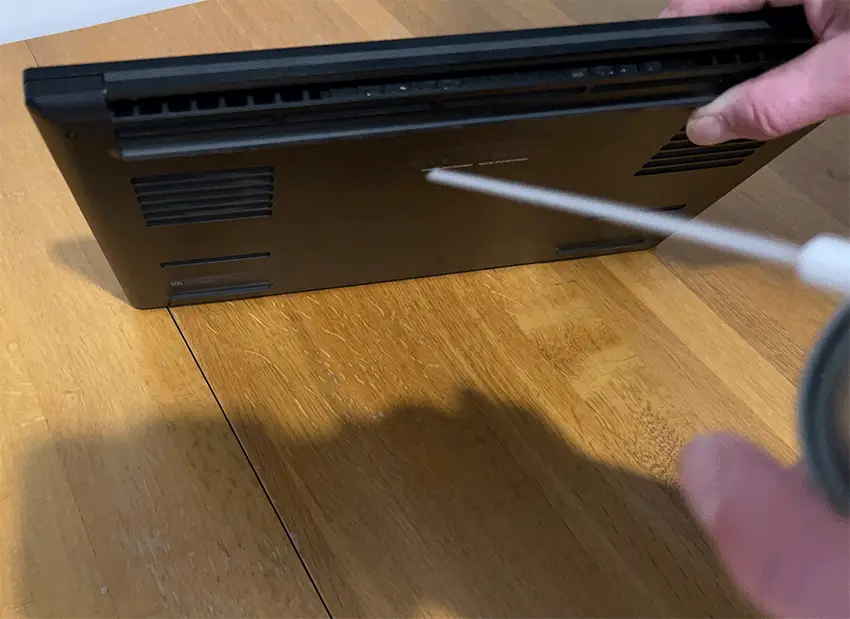
At this point, before re-attaching the bottom plate, I would suggest that you give your Razer laptop a good clean on the inside. Using compressed air and cotton swabs remove any dust and debris from around the fans, and computer components. Finally, double check the new SSD or SSDs are in place, before you place the cover back with the screws.
Step7# – Boot from recovery drive to install Windows on new SSD
Now it is time to boot your Razer Blade back up and restore your files from the recovery drive. So, plug in the recovery drive you created earlier and then follow the on-screen instructions. One complete, remove the drive and then go to Settings > Update & Security > Check for Updates to check for any Windows updates, download and install any updates.
Step8# – Verify upgraded storage capacity in File Explorer
After successfully installing the new SSD into your Razer Blade, it’s time to ensure everything is working smoothly. Using the Windows operating system to check if the new SSD is being detected. First, open up the “File Explorer” on your Razer computer. By clicking on the folder icon located on your taskbar at the bottom of the screen.
Once you have the Windows File Explorer open, look for a section called “This PC” or “My Computer” on the left-hand side of the window and click on it. This will show you all the storage devices that Windows has detected on your Razer Blade computer.
If your new SSD is showing up, you should see it listed under this section with a name or label assigned to it. It might be something like “Local Disk (D:)” or “New SSD (E:)” depending on how Windows assigns drive letters. If not, there is something wrong, I would suggest going back through the steps to troubleshoot what could have happened.
Reinstalling Razer Blade Drivers
After upgrading your Razer Blade’s storage and to ensure optimal performance, it is essential to reinstall the drivers to ensure everything runs smoothly. Here’s how you can do it:
- Visit the official Razer support website.
- Locate the “Drivers” or “Support” section on their website.
- Enter your specific Razer Blade model and operating system details.
- Download the latest versions of all available drivers for your device.
- Once downloaded, run each driver installer one by one and follow the on-screen instructions to complete the installation process.
- Then restart your Razer Blade laptop for the updates to take effect.
Reinstalling drivers ensures that all necessary components are up-to-date and functioning optimally, providing a seamless user experience
Ensure all necessary drivers are properly installed
By reinstalling all necessary drivers after upgrading your Razer Blade’s storage, you can ensure that every component of your laptop functions at its best potential. Outdated or missing drivers can lead to various issues such as lagging graphics, unstable Wi-Fi connections, or malfunctioning touchpads. Here are some key points to keep in mind:
- Check for updates regularly: Visit the official Razer website periodically to download and install any new driver updates released for your specific model.
- Use automatic driver update tools: Consider utilizing automatic driver update tools like “Razer Synapse 3” to scan for outdated drivers and install them with just a few clicks.
- Take advantage of manufacturer support: If you encounter any difficulties during the driver installation process, reach out to Razer’s customer support for assistance.
Troubleshoot any problems that may occur
Sometimes, despite our best efforts, problems can arise during driver reinstallation. Here are a few troubleshooting tips to help you overcome common challenges:
- Check for conflicting software: Some applications or antivirus programs might interfere with driver installations. So, temporarily disable them before reinstalling drivers.
- Rollback changes if necessary: If you notice any performance issues or compatibility problems after reinstalling drivers, consider rolling back to previous versions or seeking assistance from Razer’s customer support.
- Seek community support: Online forums and communities dedicated to Razer products can provide valuable insights and solutions for troubleshooting specific issues.
Avoid compatibility issues with the new storage
When upgrading your Razer Blade’s storage, it is vital to ensure compatibility between the new hardware and existing drivers. Following these step-by-step instructions will help you avoid any potential compatibility issues:
- Research before purchasing: Before upgrading your storage device, check if the SSD drive is compatible with your specific Razer Blade model.
- Consult the manufacturer’s documentation: Read through the documentation provided by both Razer and the storage device manufacturer to understand any recommendations.
- Follow proper installation procedures: Ensure that you follow all guidelines provided by the manufacturer when installing the new storage device.
- Reinstall drivers promptly: Immediately after upgrading the SSD, reinstall all necessary drivers using the guide mentioned earlier in this article.
Frequently Asked Questions
Will upgrading my SSD storage void my warranty?
Typically, upgrading Razer Blade components like RAM or SSD does not void the warranty, as long as it is done properly without causing any damage to other parts of the device. However, always check with Razer’s official support or refer to their warranty policy for accurate information.
How much storage can I add to my Razer Blade?
The amount of storage you can add depends on various factors such as the model of your Razer Blade and its available slots for expansion. Most newer Razer Blade laptops can take up to 4TB’s of SSD storage, so check your device specifications or consult with official support for precise details.
Can I still use my old hard drive after upgrading?
Yes, if you are replacing your existing hard drive with an upgraded SSD (solid state drive), you can still use your old hard drive for another computer, or use it as an external storage device by connecting it via USB adapter.
Is it necessary to reinstall drivers after upgrading?
While it may not be necessary in all cases, reinstalling the drivers and restarting your Razer laptop after upgrading components like storage can help ensure optimal performance and compatibility.
Maximizing Razer Blade Storage Capacity
Congratulations! You have now completed several crucial steps to maximize the storage capacity on your Razer Blade. From understanding compatibility and options for storage upgrades to reinstalling drivers and upgrading SSD and RAM on your Razer computer, you are well on your way to enhancing the performance of your device.

